
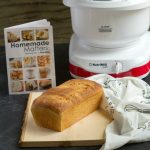
Making a toast, sandwich or bread pizza with fresh bread is so easy! Today I am going to show you how to make this Basic Homemade White Bread with bread flour, and also how I kneaded the dough using my NutriMill Artiste.
Disclosure: I received this product for review from the NutriMill, but the opinions and thoughts expressed here are my own. Also, this post contains affiliate links.
Homemade White Bread
I have posted quite a few bread recipes on my blog like challah, Russian rye bread, vanocka, focaccia. All these bread were hand-kneaded, and also I shaped them by hand. In the course of exploring new recipes, I always miss the basic recipes. Now it’s high time; I post all those basic recipes. So I am starting with this simple homemade white bread.
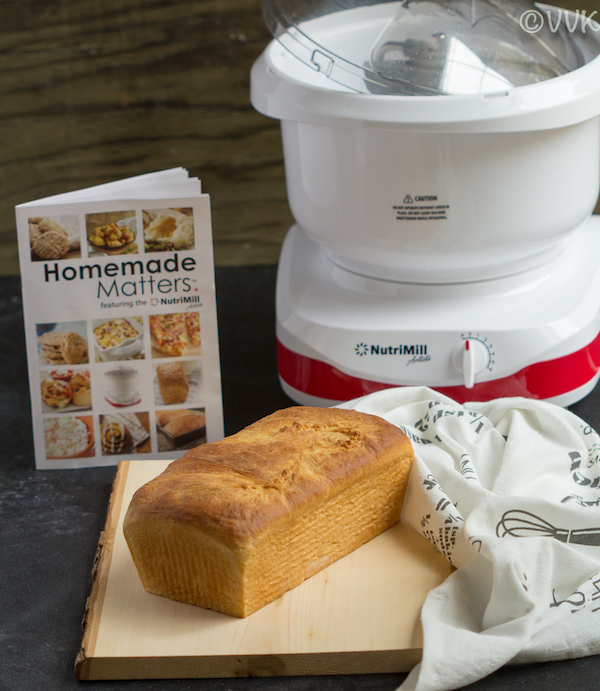
I always wanted a stand mixer, and I was contemplating among a few brands out there. That’s when I got this opportunity to try out the NutriMill Artiste Mixer, the new product of the NutriMill, the sister company of L’Chef / Bosch. I was super excited, and as I was already researching about stand mixers, I knew what I need to look for, and NutriMill Artiste Mixer met all my requirements.
Before getting into this Homemade White Bread recipe, let me share the pros and cons of NutriMill Artiste Mixer.
Pros:
- Size: NutriMill Artiste Mixer has a high-efficiency bottom-drive motor that can mix up to 10 pounds of whole grain dough. The size of the artiste mixer is just perfect, and it is lightweight. It comes with one pulse (“P”) mode and with six speeds. Even with a 650-Watt motor and 6.5-quart bowl, it is easy to carry around. It is compact and doesn’t take up much of the counter space. You can place it on shelves/pantry too and take it when needed.
- Ease of Use: You can quickly assemble the artiste mixer and fixing the dough hook, or wire whips can’t get easier than this. I love the easy open bowl cover, and it keeps the baking work mess-free. You can add the liquids and the flour without the fear of splashing or spilling.
- Dough Hook: I love this attachment, and it is specifically designed to mimic hand kneading. I tried making yeast-based bread and also the Indian flat-breads, and it is perfect. (Will share the recipes soon)
- Cleaning: You can disassemble all the parts and clean them quite easily. You cannot use the dishwasher for cleaning the dough hook and the wire whip. But as I mentioned they are not difficult to clean.
- Accessories: All Bosch mixer accessories fit the artiste as well and guess what; they have a wide range including ice cream maker, pasta maker, and food processor and blender attachments.
- Price: It is affordable and the basic model with the dough hook and wire whip (this is what I have) is $299 and if you want the full bundle it is $370.
Cons:
I was a bit skeptical about the plastic bowl, and I checked regarding the same with the team. (Before posting any reviews, I take my time to analyze and understand the product thoroughly. I interact with the product team and get all my questions answered before posting it on the blog).
During their recipe tests, the team found that the plastic bowl performs better than stainless steel. Whipping is comparatively better in plastic. But they are also developing the stainless steel bowl for the artiste, and it will be soon available on the market.
Now back to the Homemade White Bread recipe and some bread baking basics.
Bread Flour vs. APF
Bread flour has more protein content than APF and that, of course, helps with the gluten development and bread rise. Even though you may notice texture difference you can use APF in place of bread flour and vice versa. I used King Arthur’s unbleached bread flour.
Loaf Pan Size:
This below measure yields one small-loaf of size – 8.5 x 4.5 x 3 Inch The rule of thumb is if your flour measurement is less than or equal to 3 cups then use the small loaf pan or you can use the big one. As mine is just 2.25 cups, I went with a small loaf pan. You can read more choosing the right bread pan at King Arthur’s blog.
Some dos and don’ts of bread baking: Bread baking is a science, and there is always room for improvement. With every loaf, you learn something new. I know, purists might not call this as a perfect loaf, but I can assure you that the texture and taste of this bread are amazing.
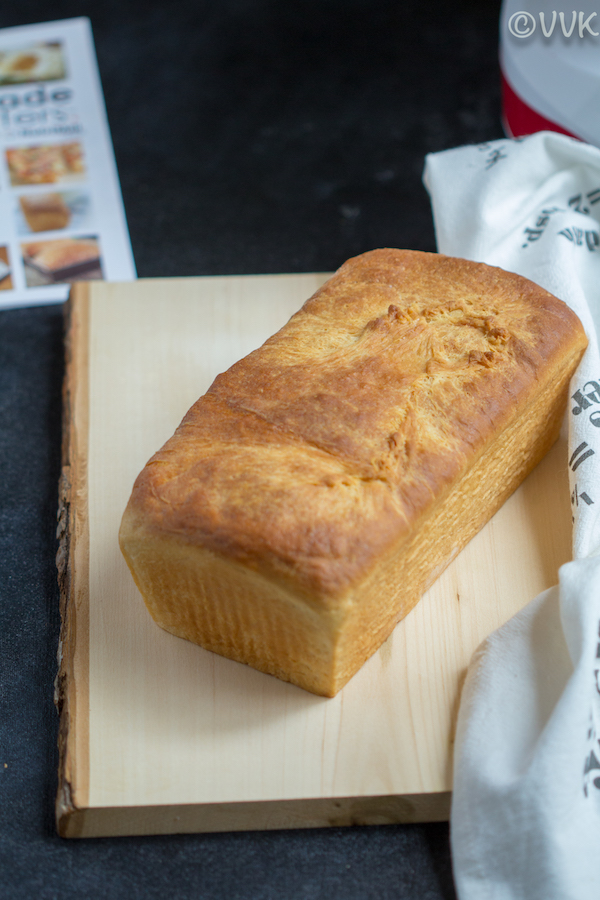
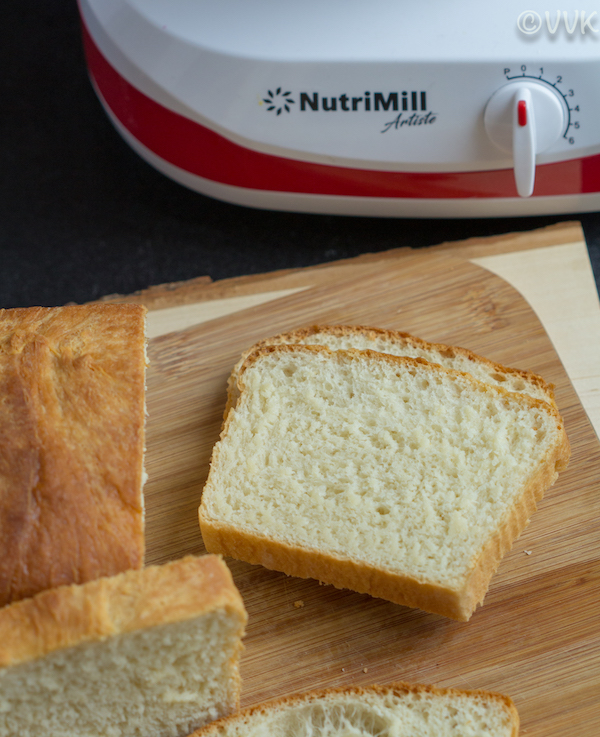
However, I do want to highlight a few points – I know it’s a big no-no to slice the bread when it is warm. You always need to wait for at least 30 to 45 minutes. But relishing a warm slice of bread with butter right out of the oven is something I love. The above picture is taken when the bread is hot/warm and here is the other after cooling down. :-)
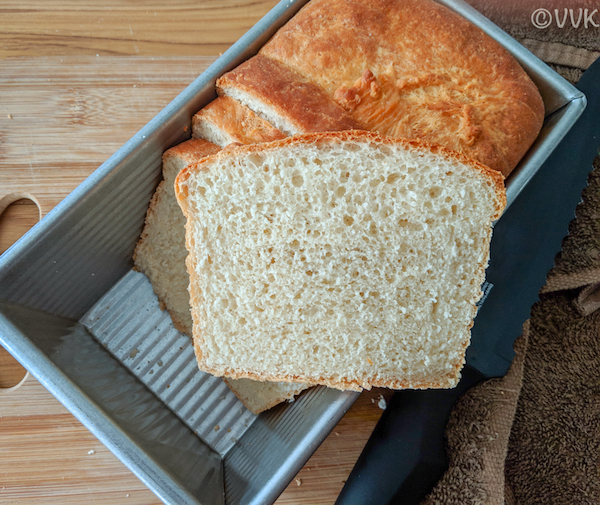
Also, use a cloth to cover when you let the dough rise especially in the loaf pan. If you are using cling-film, be careful while removing it. I remove it fast, and you can see the marks on the crust.
Now without further ado, here is the white bread recipe. (Recipe adapted from the NutriMill Artiste Recipe Book that came along with the mixer)
Basic Homemade White Bread Recipe
Ingredients:
- ½ cup luke-warm milk
- ½ cup luke-warm water
- 2 tbsp salted butter, at room temperature + 2 tsps for greasing
- 2 tbsp sugar
- ½ tsp salt
- 2.25 tsp instant yeast, one packet
- 2.25 cups bread flour
Steps:
- Attach the dough hook and with the dough hook in place, add the milk, water, butter, sugar, salt, yeast and ¼ cup of the bread flour.
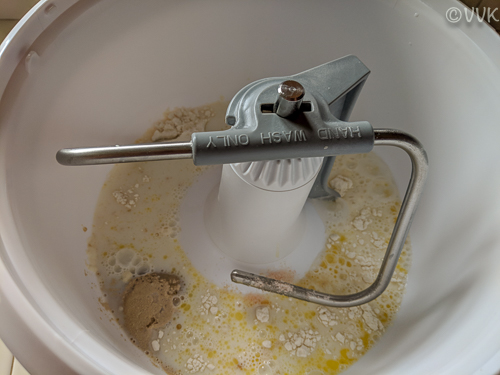
- Use the “P” switch to mix the ingredients.
- When combined, close the lid and leave it for about 20 to 30 minutes until it becomes bubbly. This step is not required as we are using instant yeast. But allowing the batter to rest, enhances the flavor.
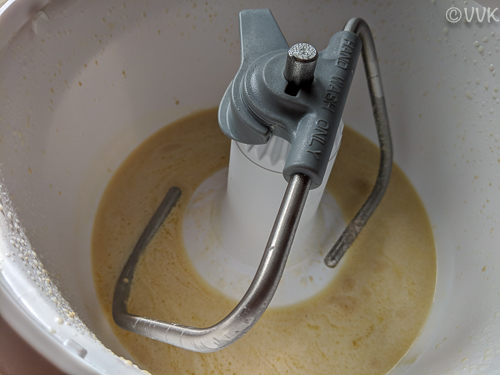
- Now increase the speed to level 3 and add the remaining flour ¼ cup at a time.
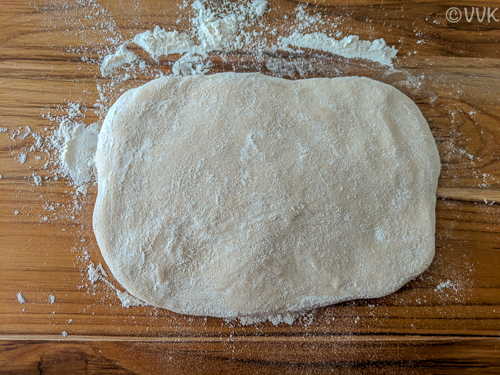
- After adding all the flour, close the lid and continue kneading the dough for five to six minutes at speed 3 or until the dough is smooth and elastic. When it is well kneaded, the dough will now stick to the bowl, and it will be like below.
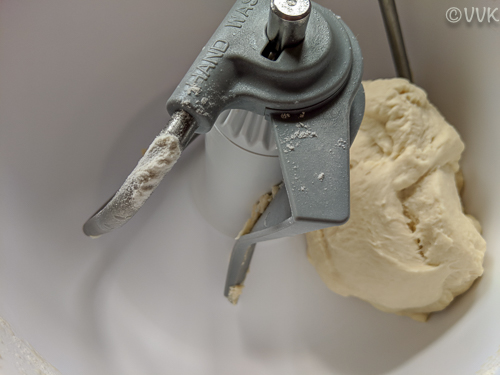
- Flour your hands and the counter or the board with flour and remove the dough from the mixer and place it on the board.
- Shaping the bread:
- Flatten the dough and form a rectangle.
- Pick the long side and fold it half-way through. And pick the other long side and fold it half-way through and gently press in the middle.

- Then take the shorter sides and tuck them in.

- Flip it and form a log.

- Place this log in a greased loaf pan. Cover it with cloth or cling film and allow it to rise.

- It should double in size (it took one hour for me). Don’t let it rise too much, as it might weaken the structure.

- If using cling-film, then carefully remove it.
- And brush the top the bread with butter or milk. I used butter.

- Bake the bread for 35 to 40 minutes in a preheated oven at 350 deg F. The crust should be golden brown.

- Allow it to cool for at least 30 minutes before slicing.
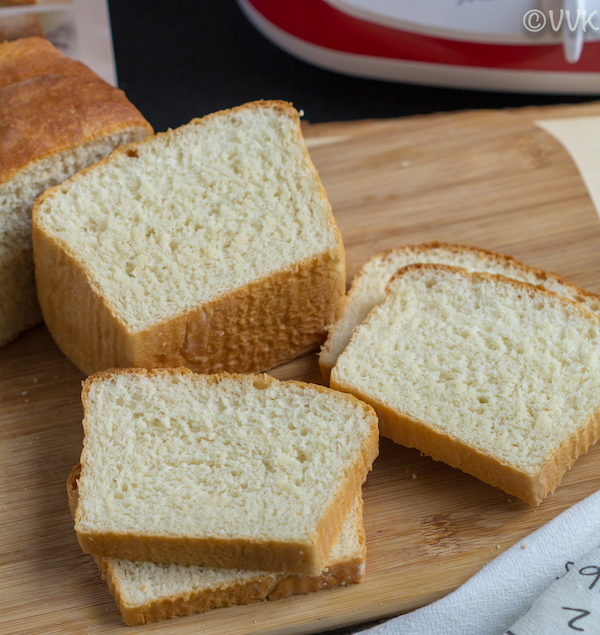
The bread stays good for up to one week.
Recipe Notes:
- You can use APF, instead of bread flour.
- Make sure you are using the right loaf-pan and also please read the dos and don’ts above.
- If you are using any other mixer, please follow the instructions mentioned in the manual.
- If you are kneading the bread with hand, knead for at least 15 to 20 minutes until the bread is smooth and elastic.
- You can double this measure and make two small loaves or one big loaf in the 9-inch pan.
- Temperature plays a significant role in dough rise so wait patiently but during warm weather check the dough after an hour.
Explore a variety of bread recipes:
- Semi-Fried Bread
- Braided Eggless Challah Bread
- Vegan Banana Bread | Eggless Banana Walnut bread
- Rotimatic Pita Bread
📖 Recipe
Basic Homemade White Bread
Ingredients
- ½ cup luke-warm milk
- ½ cup luke-warm water
- 2 tbsp salted butter at room temperature + 2 tsps for greasing
- 2 tbsp sugar
- ½ tsp salt
- 2.25 tsp instant yeast one packet
- 2.25 cups bread flour
Instructions
- Attach the dough hook and with the dough hook in place, add the milk, water, butter, sugar, salt, yeast and ¼ cup of the bread flour.
- Use the "P" switch to mix the ingredients.
- When combined, close the lid and leave it for about 20 to 30 minutes until it becomes bubbly. This step is not required as we are using instant yeast. But allowing the batter to rest, enhances the flavor.
- Now increase the speed to level 3 and add the remaining flour ¼ cup at a time.
- After adding all the flour, close the lid and continue kneading the dough for five to six minutes at speed 3 or until the dough is smooth and elastic. When it is well kneaded, the dough will now stick to the bowl, and it will be like below.
- Flour your hands and the counter or the board with flour and remove the dough from the mixer and place it on the board.
- Shaping the bread:Flatten the dough and form a rectangle. Pick the long side and fold it half-way through. And pick the other long side and fold it half-way through and gently press in the middle.
- Then take the shorter sides and tuck them in and form a log.
- Place this log in a greased loaf pan. Cover it with cloth or cling film and allow it to rise. (It took one hour) It should double in size. Don't let it rise too much, as it might weaken the structure.
- If using cling-film, then carefully remove it.
- And brush the top the bread with butter or milk. I used butter.
- Bake the bread for 35 to 40 minutes in a preheated oven at 350 deg F. The crust should be golden brown.
- Allow it to cool for at least 30 minutes before slicing.
- The bread stays good for up to one week.
Notes
- You can use APF, instead of bread flour.
- Make sure you are using the right loaf-pan and also please read the dos and don'ts above.
- If you are using any other mixer, please follow the instructions mentioned in the manual.
- If you are kneading the bread with hand, knead for at least 15 to 20 minutes until the bread is smooth and elastic.
- You can double this measure and make two small loaves or one big loaf in the 9-inch pan.
- Temperature plays a significant role in dough rise so wait patiently but during warm weather check the dough after an hour.
Nutrition
I am not a nutritionist. The nutritional information is provided as a courtesy and is an estimate only. It varies depending upon the product types or brands.

Excellent recipe will surely try it
Whats other ingredient can I use other than bread flour.
Thanks. You can always use All Purpose Flour / Maida.