

Delicious ragi/finger millet puttu (steamed flour cakes) made in Instant Pot without puttu maker. A healthy and delicious breakfast in a jiffy! Check out how to make healthy ragi puttu and how to steam puttu in Instant Pot.
What is Puttu-
Puttu is a popular breakfast dish from God’s own country Kerala. Puttu is nothing but steamed rice flour cakes or logs layered with coconut in between. Traditionally puttu is prepared with rice flour or red rice flour, but you can also make it with other flours like wheat or millet or quinoa as well. Today I am sharing the ragi /finger millet flour puttu recipe.
Puttu Podi/Flour-
You can easily find puttu flour in Indian groceries and online as well. You can find white rice ones, red rice ones, and even wheat ones here in the US. I always have a pack of puttu podi in my freezer. Preparing puttu is very simple. All you have to do is mix the flour with water and steam it. Yes, it is as simple as that. Did you notice it doesn’t need any oil?
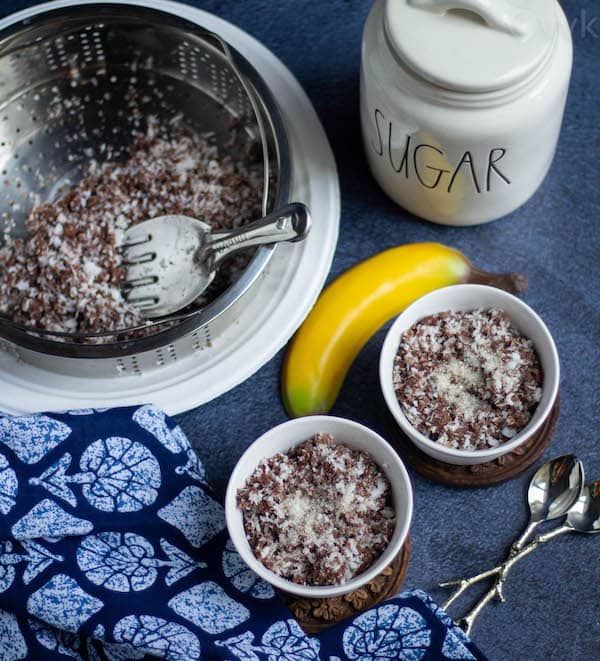
Puttu is a healthy breakfast option for sure. Serve it with a banana and cooked green gram/ green moong dal for a balanced and a filling meal. You can also serve it with black chickpeas curry. This ragi puttu is vegan and gluten-free.
I love it with banana and sugar. I try to use raw sugar or coconut sugar. Sugar is sugar but you can skip it and relish it in your preferred way.
Steaming Puttu-
Now you can steam puttu in the puttu maker or without puttu maker also. You can find the cylindrical (kuzhai) puttu maker or the round ones (chiratta puttu maker) in Amazon online or in Indian groceries. You can check my quinoa puttu post for how to steam puttu in that puttu maker.
But if you don’t want to buy those, you can steam it in a bowl or even in the idli molds. Of course, you need to add coconut and do the layering before cooking.
Steamer Basket-
Recently I started to steam puttu in the Instant Pot. Initially, I was doing it in the PIP method and used a bowl (I place the puttu mix inside the bowl and place it on a trivet) inside the inner pot. But I recently started to do it in a steamer basket instead of a vessel.
The holes in the steamer basket spread the steam evenly and keep it moist. We love to pack puttu for lunch, and when I steam it using my steamer basket, it stays soft and moist for a long time.
I highly recommend a stainless steel steamer basket or a steamer rack with slightly raised edges. I got mine as a part of the Instant Pot accessories kit. It comes in handy for many recipes. You can quickly steam your veggies like green beans, beets, potatoes, cauliflower. You can see me using it for my cauliflower rice, green beans curry, beets salad, etc.
Ragi Puttu-
Today I am going to share how to make puttu with store-bought ragi or finger millet flour. Also, how I steamed the puttu using my steamer rack. (PS – This is regular ragi flour and not ragi puttu podi.)
So let’s get right into it without any further ado,
Prepare the Puttu Flour:
- In a bowl, add the puttu flour and salt. Mix it well.
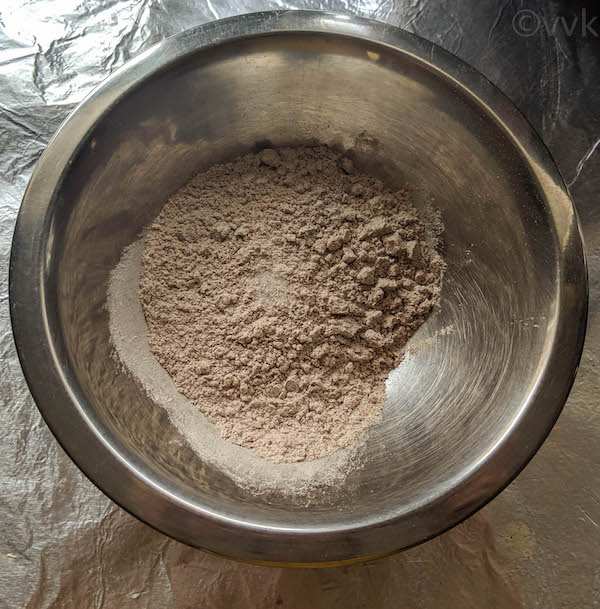
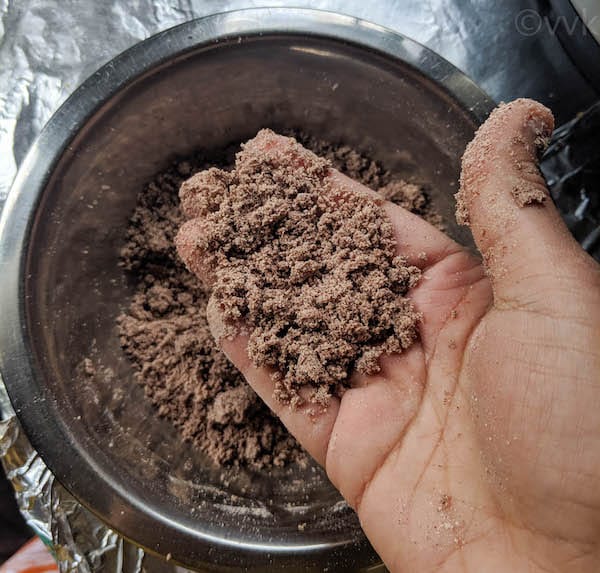
- Now add water 1 tbsp at a time and gently mix. The flour should be wet, but it should have cornmeal consistency/sand consistency.
- Consistency check – When you take a small amount of flour in your fist, and press it should form a shape like below.
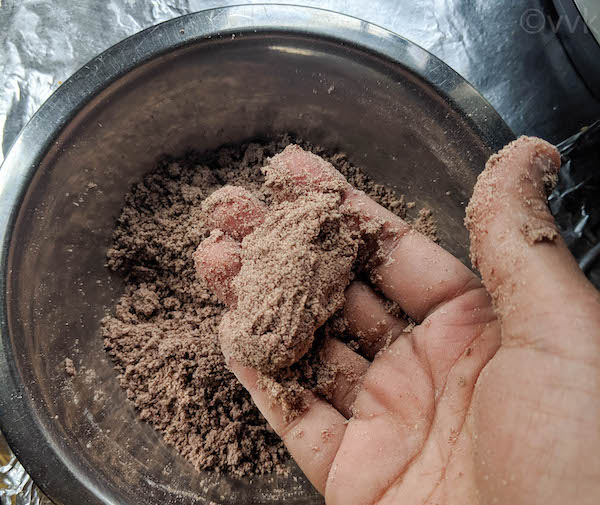
- You should be able to break it back to the cornmeal consistency again. So add water as needed.
Assembling the Ragi Puttu:
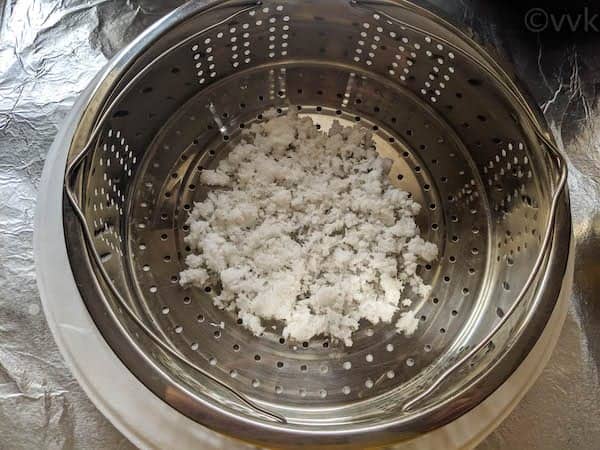
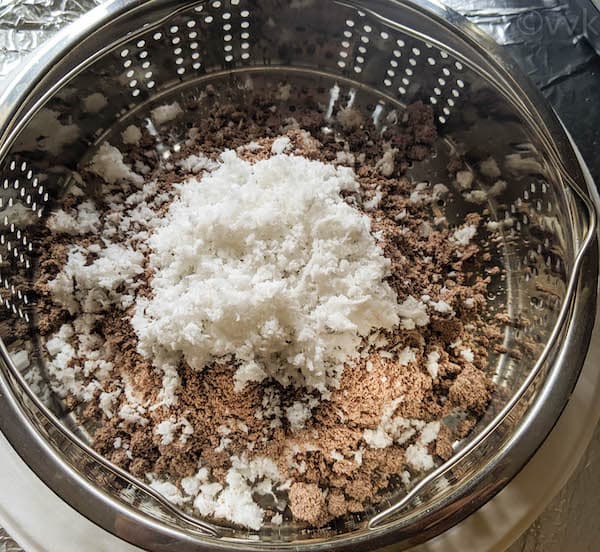
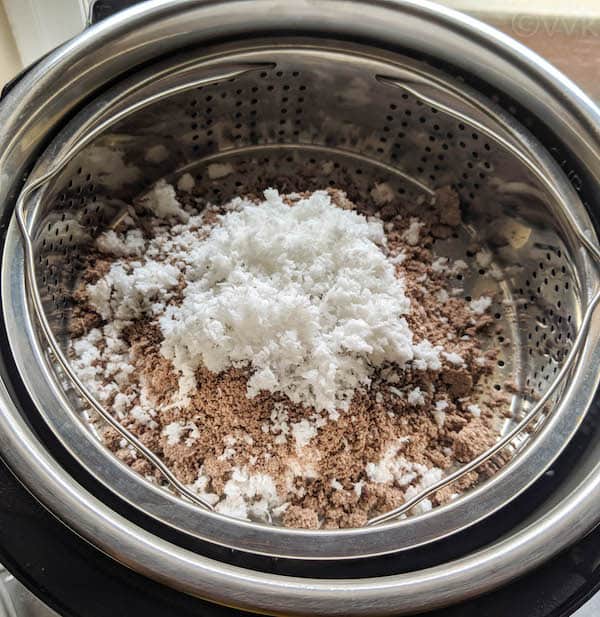
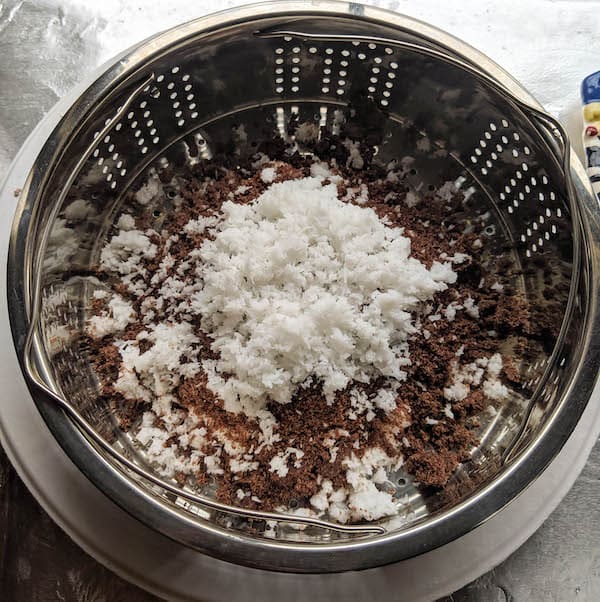
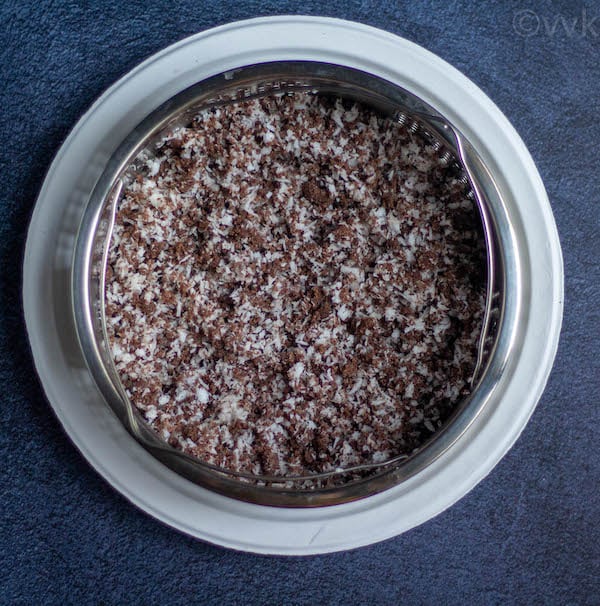
- Now spread ¼ cup of the grated coconut in the steamer rack or basket, as shown below. If you are using a steamer basket with slightly big holes, place a plate beneath the steamer just during layering.
- Then spread half of the prepared ragi flour on top of the coconut. We are forming an alternate layer of coconut and ragi flour.
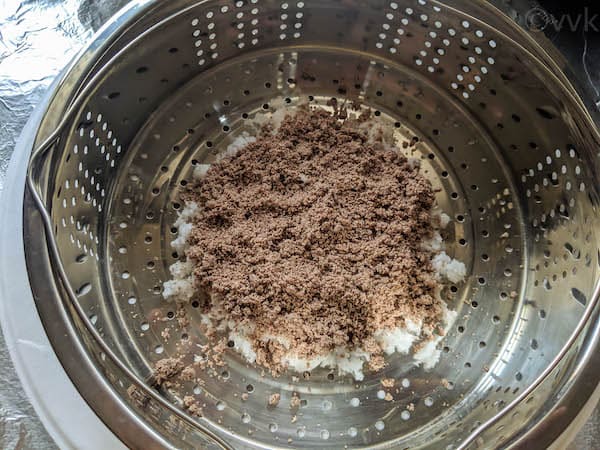
- Now add ¼ more cup of grated coconut on top of the ragi flour and spread it.
- Next, add the remaining ragi flour, followed by the coconut. Here is my layered puttu mix.
Steaming the Puttu:
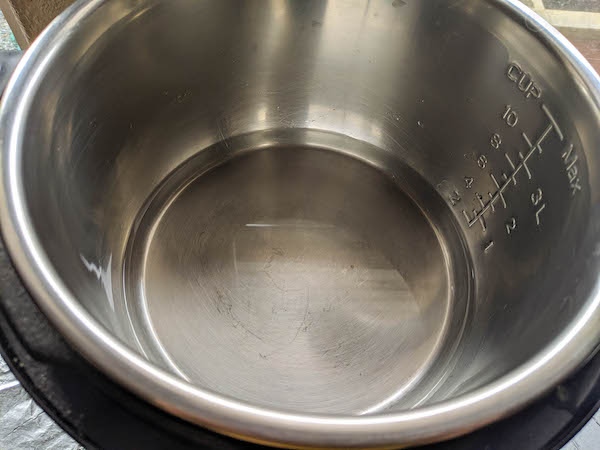
- Add 1 cup of water to the inner pot of the Instant Pot.
- Then place the tall trivet or the egg rack.
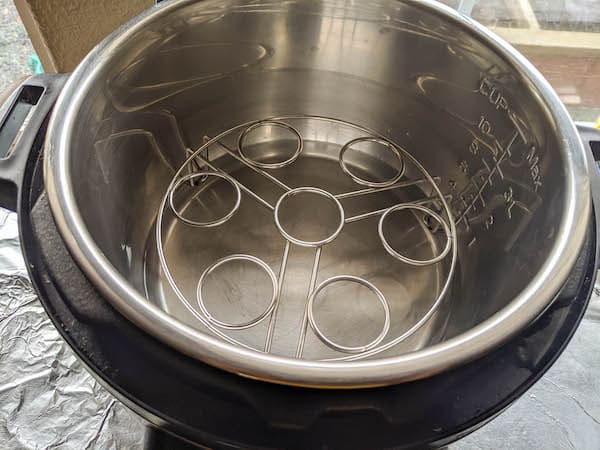
- And then the steamer basket with puttu on top of it.
- Make sure the vent is in the sealing position, and the sealing ring is on.
- Close the Instant Pot and Pressure cook the puttu for 8 minutes at high-pressure mode and let the pressure release naturally.
- The pressure releases pretty fast. Mine went down in 6 minutes.
Mixing and Serving:
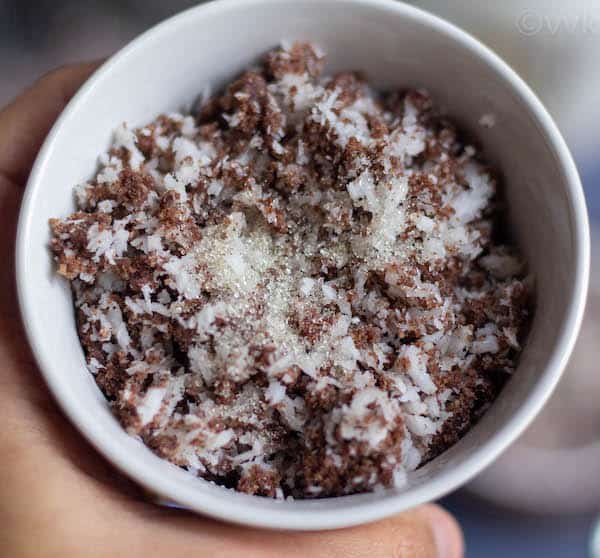
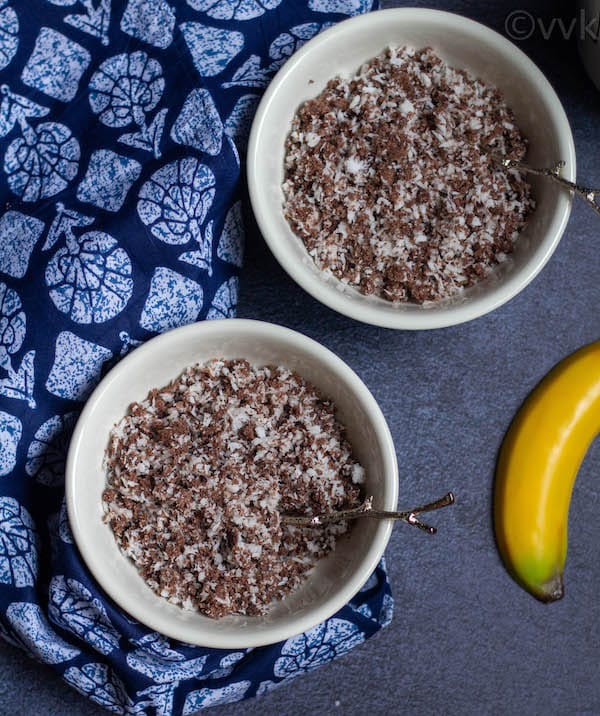
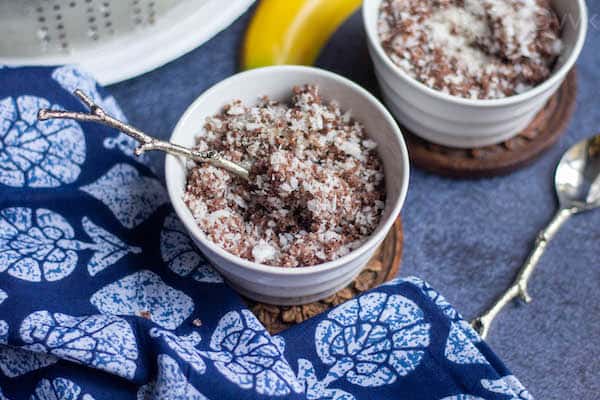
- Let the puttu cool for 5 minutes and gently mix. I usually add sugar and serve it along with a banana. But if you are planning to serve it with any curries, skip the sugar.
- Serve hot in your desired way either with kadala curry or with sugar.
Recipe Notes-
- If you are using a store-bought puttu mix made with white rice, then you can steam it for 4 to 5 minutes. But if you are using wheat or red rice-based puttu powder, steam it for 6 to 8 minutes.
- I did not roast the ragi flour, and we did not have any raw smell issues. But if you are particular about it, please roast the ragi flour without adding any oil for 30 to 45 seconds over medium-low heat. Let it cool and then mix it with water.
- We love our puttu with sugar, so I mix it with sugar while serving, but that’s completely optional.
- Coconut Measure – As you can see, my coconut measure is more than ragi flour. Again, it’s our personal choice, especially with ragi flour, we liked it that way. But you can use ⅓ to ½ of grated coconut for this measure.
- For this ragi flour measure, you will need between 3 to 4 tbsp of water or the max 5 tbsp but not more than that.
PS: Follow me on Instagram or join my Facebook Group for more gardening and recipe updates. If you try this ragi puttu recipe, please don’t forget to comment and rate this recipe. If you have any questions, please leave a comment, and I will get to it asap. Make sure to follow me on my Pinterest for more healthy and delicious ideas!
📖 Recipe

Ragi Puttu | Instant Pot Finger Millet Puttu
Equipment
- Electric Pressure Cooker like Instant Pot
Ingredients
- ½ cup ragi flour finger millet flour
- ⅛ tsp salt a pinch
- 3 to 4 tbsp water plus 1 cups water for the inner pot
- ¾ cup coconut grated if using frozen, thaw it to room temperature.
- 2 tbsp sugar or to taste
Instructions
- Prepare the Puttu Flour:In a bowl, add the puttu flour and salt. Mix it well.
- Now add water 1 tbsp at a time and gently mix. The flour should be wet, but it should have cornmeal consistency/sand consistency.
- Consistency check - When you take a small amount of flour in your fist, and press it should form a shape like below. You should be able to break it back to the cornmeal consistency again. So add water as needed.
- Assembling the Puttu:Now spread ¼ cup of the grated coconut in the steamer rack or basket, as shown below. If you are using a steamer basket with slightly big holes, place a plate beneath the steamer just during layering.
- Then spread half of the prepared ragi flour on top of the coconut. We are forming an alternate layer of coconut and ragi flour.
- Now add ¼ more cup of grated coconut on top of the ragi flour and spread it.
- Next, add the remaining ragi flour, followed by the coconut. Here is my layered puttu mix.
- Steaming the Puttu:Add 1 cup of water to the inner pot of the Instant Pot.
- Then place the tall trivet or the egg rack and then the steamer basket on top of it.
- Make sure the vent is in the sealing position, and the sealing ring is on.
- Close the Instant Pot and Pressure cook the puttu for 8 minutes at high-pressure mode and let the pressure release naturally. The pressure releases pretty fast. Mine went down in 6 minutes.
- Mixing and Serving:Let the puttu cool for 5 minutes and gently mix. I usually add sugar and serve it along with a banana. But if you are planning to serve it with any curries, skip the sugar.
- Serve hot in your desired way either with kadala curry or with sugar.
Notes
- If you are using a store-bought puttu mix made with white rice, then you can steam it for 4 to 5 minutes. But if you are using wheat or red rice-based puttu powder, steam it for 6 to 8 minutes.
- I did not roast the ragi flour, and we did not have any raw smell issues. But if you are particular about it, please roast the ragi flour without adding any oil for 30 to 45 seconds over medium-low heat. Let it cool and then mix it with water.
- We love our puttu with sugar, so I mix it with sugar while serving, but that's completely optional.
- Coconut Measure - As you can see, my coconut measure is more than ragi flour. Again, it's our personal choice, especially with ragi flour, we liked it that way. But you can use ⅓ to ½ of grated coconut for this measure.
- For this ragi flour measure, you will need between 3 to 4 tbsp of water or the max 5 tbsp but not more than that.
Nutrition
I am not a nutritionist. The nutritional information is provided as a courtesy and is an estimate only. It varies depending upon the product types or brands.

I make puttu all the time. I didn’t know I can make it in the instant pot. This is great, I can get rid of all my old pots and use this. Thanks so much. By the way you have so many yummy and great recipes on your blog. I don’t know how I missed your side all these years. Not sure “Idiyappam” can be made in the instant pot too – Place the idiyappa thattu inside the steaming basket?
Hi Chelvi, thanks a lot for taking time to write this feedback. Thanks so much. Yes, you can steam idiappam in IP too. I have tried making small ones and place them in idli tray and steam. I am yet to share steaming idiyappam and dhokla in IP. I will do soon.
Thank you so much Vidya. Yes, please post the recipe – looking forward to it. Bought an instant pot, but have not used it much. Your recipes are so useful in learning to cook on instant pot. Happy Holidays
Sure. Will do. Happy holidays to you too.
Looks tempting ! Would love to try this recipe. I have an Instant pot but don’t have a steamer basket with holes. Would this work with a regular small stainless steel vessel ?
Sorry for the delayed response. Yes, you can try but they might clump up together. You might have to spread it apart it with fork.
Hi can i use steam option instead of pressure cook option
Yes you can. If you keep the vent closed and follow the same timings
Tried this today and it was great! This was only enough for two in our home. Going to double it next time. Do you suggest the same 8 minutes of cooking or longer?
Thanks a lot. Glad you liked it. Even if you double it 8 mts sufficient. You can go up to 10mts but not more than that.
Sounds good, thanks! I’m new around here but looking forward to trying a few more recipes soon.