

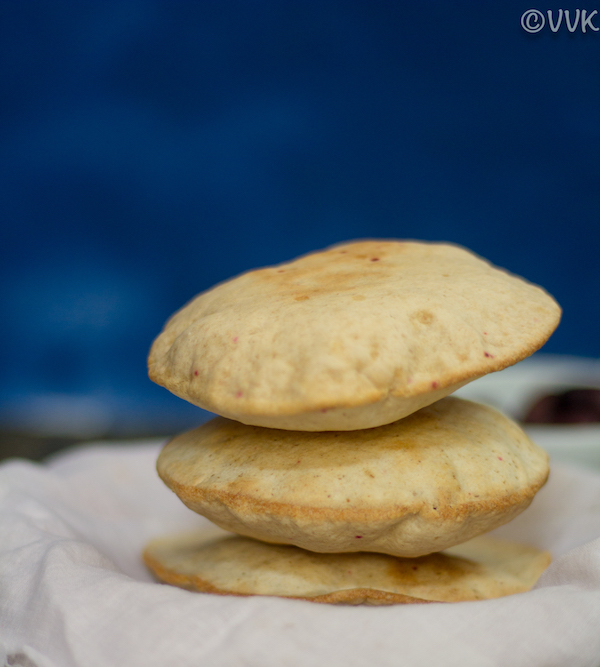
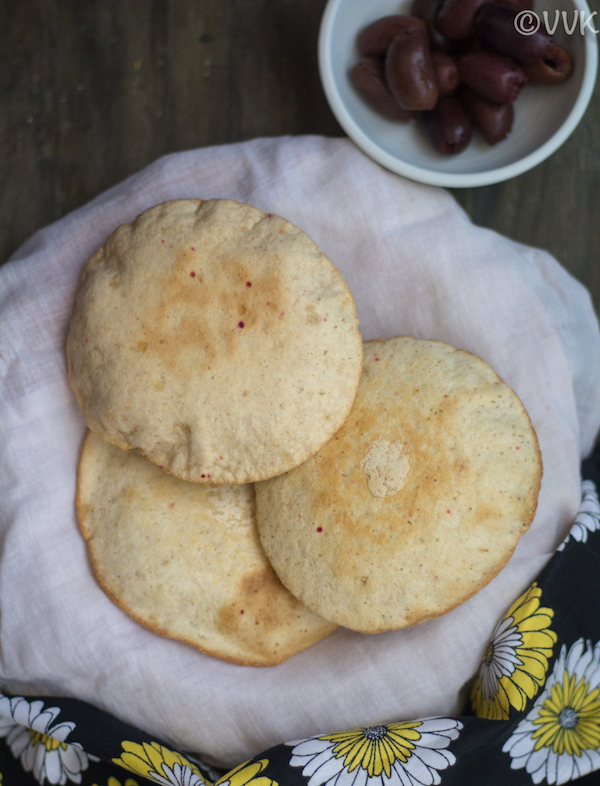
Do you like Pita Bread but worried about buying from the store? Fret not! Here is a soft and puffy homemade Rotimatic Pita Bread. Yes, your Rotimatic can make Pita bread, too. Look no further, and get into the detailed recipe with lots of tips to make that perfect pita bread with your Rotimatic.
Rotimatic Pita Bread
While experimenting with Rotimatic pizza recipes, I got sidetracked and started trying this Pita Bread instead. I love pita pocket salads. I love the richness of the Mediterranean salads filled inside this pita breads.
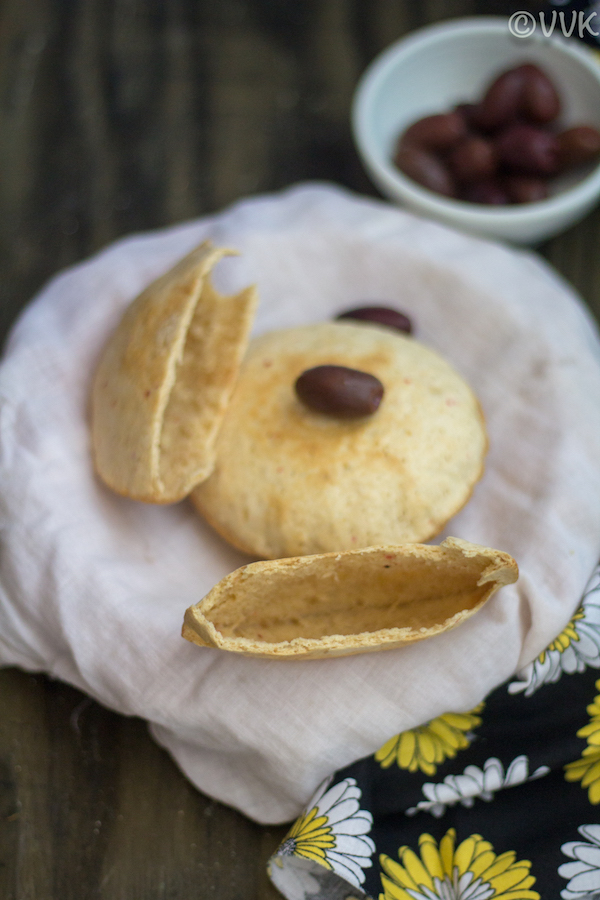
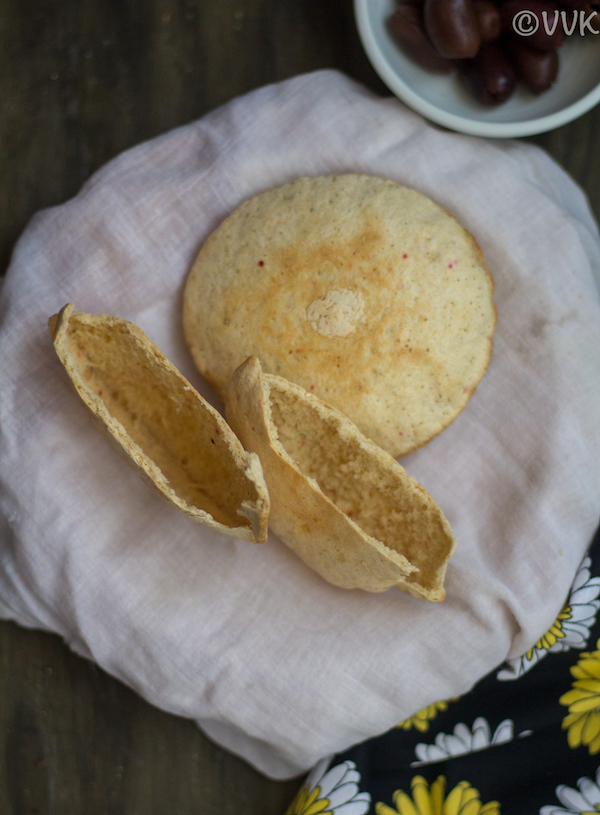
To make a pita pocket, you need to have fluffy pita bread, and when you cut the pita bread into two, you should get the hallow pockets like in the picture. And I was trying to make similar pita bread with Rotimatic and guess what, I did make it.
The below measure worked out perfectly for me. So I used the Pizza setting went full maximum thickness (5) but with minimum roast level. The yeast amount is slightly on the higher side, but I think we need that for this Rotimatic pita bread.
How to Make Rotimatic Pita Bread?
All you have to do is mix the flour and add it to the Rotimatic flour container. And let the Rotimatic knead the dough and roll it out for you. After that, take the rolled bread and keep in a clean bowl or glass try and cover it with cling film and allow it to sit for at least 2.5 hours. As the weather was a bit cold, I kept inside my oven without turning on the light.
After 2.5 hours, you can see the expansion of the bread slightly. Now it is ready to bake. I would highly recommend using a pizza stone for this recipe, but you use other alternatives for pizza stone like cast iron pan or baking sheet. If using the baking sheet, invert it and keep it in the oven while pre-heating. Placing the pita bread on the hot surface yields a nice crust around the edges and soft and moist bread in the middle.
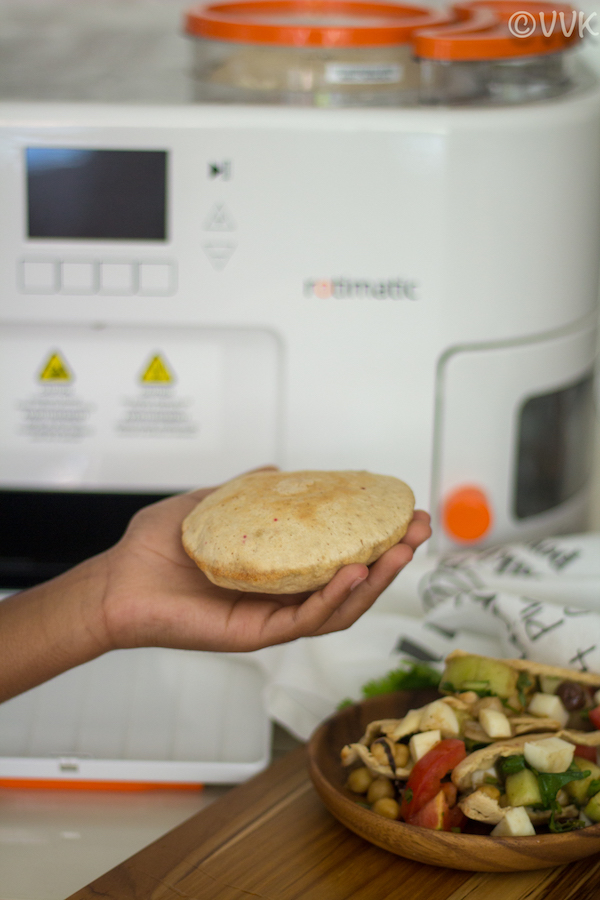
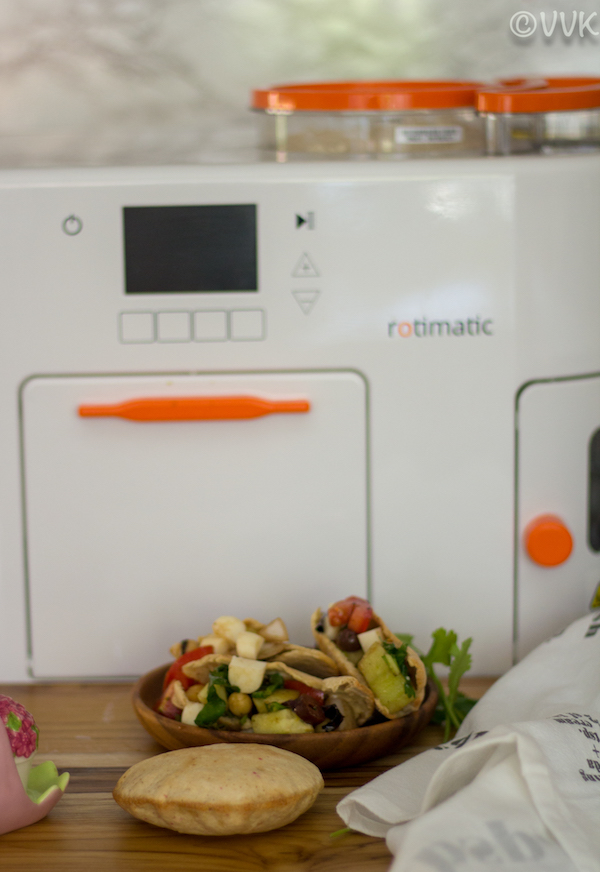
Now that you have the pita bread ready, thanks to Rotimatic, you can start making delicious wraps and salads with your pita bread.
Get Your Rotimatic
As you can see, there are endless possibilities with Rotimatic. It can not only make roti and puri. But pizza and pitas and other exotic recipes too. Stay tuned for more recipes, before getting into the recipe, let me share you the coupon and link from where you can order your rotimatic. Order Rotimatic with coupon code “ROTIMATIC50.”
Rotimatic Pita Bread Recipe
Ingredients:
- Flour Mix:
- Wheat Flour – 1.5 cups
- All-Purpose Flour -1.25 cups
- Salt – 1 tsp
- Active Dry Yeast – 2 tsps
- Sugar – 1 tsp
- Water – as required to fill the water container
- Oil – as needed to fill the oil container
Rotimatic Settings:
- Recipe: Pizza
- Flour: Aashirvaad Select
- Thickness: 5
- Roast: 1
- Oil: 2
Steps:
- In a bowl, add all the ingredients.
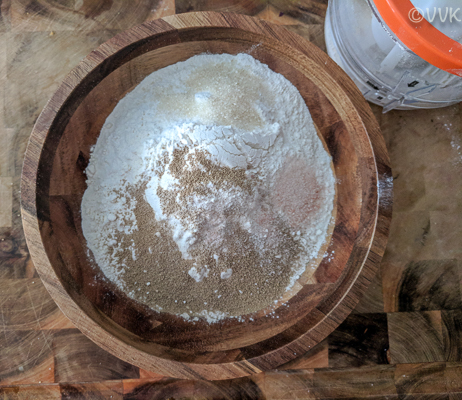
- Mix it thoroughly.
- Transfer it to the flour container of rotimatic.
- Now start the rotimatic and select the pizza option and the flour. I used Aashirvaad Select.
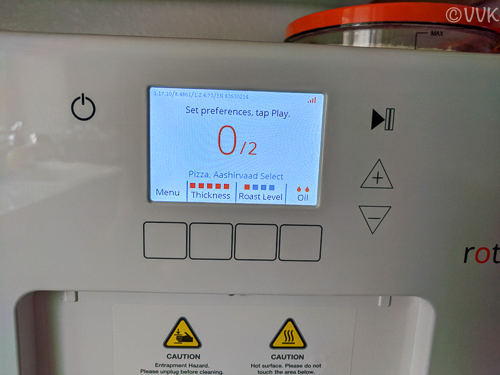
- Select your thickness (5), roast level(1), and oil(2). You can see the setting level above.
- Select the count and let the rotimatic do its magic.
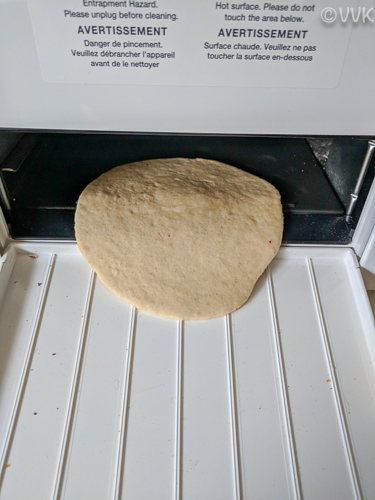
- Take the pressed bread and keep it on the tray or glassware.
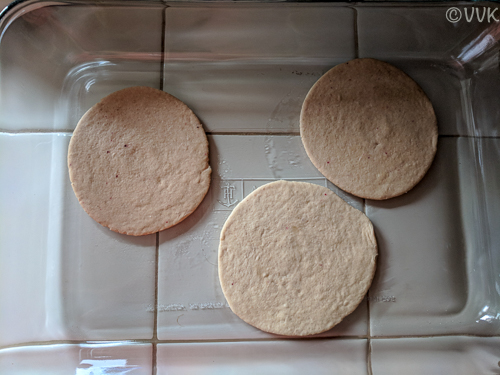
- And wrap it with the cling film.

- Let it sit for 2.5 hours.

- While it is about 2 hours, you can pre-heat the oven with the pizza stone inside to 450 deg F. If you don’t have a pizza stone, then place the baking tray upside down and pre-heat it. Keeping the tray upside down helps to slide the bread quickly.
- Remove the cling film and carefully place the rolled bread on the pizza stone.
- Bake at 450 deg F for four minutes and flip it once and bake again for one minute.
- Now carefully remove them from the oven and allow it to cool a bit.
- You can serve this with hummus or cut them into halves and fill it with salad. I will post what I did with my pita pockets. (Here is the pita pocket salad recipe)
Notes:
- As we are handling hot oven here, please be careful while placing the bread and removing it from the oven.
- You can add the salt to the water container as well instead of mixing it with the flour.
- This measure works perfectly fine, but with different flours, it might not be the case. Adjust the yeast amount or the resting time accordingly.
- Flipping and baking are not necessary; you can bake it for 4 minutes or until the bread puffs up. It should not take more than 6 to 7 minutes.
- If you don’t have rotimatic, don’t worry. I have the traditional pita bread recipe for you. Check out my easy to make zaatar bread.
📖 Recipe
Rotimatic Pita Bread
Ingredients
Flour Mix:
- 1.5 cups Wheat Flour
- 1.25 cups All-Purpose Flour
- 1 tsp Salt
- 2 tsps Active Dry Yeast
- 1 tsp Sugar
- Water as required to fill the water container
- Oil - as needed to fill the oil container
Rotimatic Settings:
- Recipe: Pizza
- Flour: Aashirvaad Select
- Thickness: 5
- Roast: 1
- Oil: 2
Instructions
- In a bowl, add all the ingredients.
- Mix it thoroughly.
- Transfer it to the flour container of rotimatic.
- Now start the rotimatic and select the pizza option and the flour. I used Aashirvaad Select.
- Select your thickness (5), roast level(1), and oil(1). You can see the setting level above.
- Select the count and let the rotimatic do its magic.
- Take the pressed bread and keep it on the tray or glassware and wrap it with the cling film.
- Let it sit for 2.5 hours.
- While it is about 2 hours, you can pre-heat the oven with the pizza stone inside to 450 deg F. If you don't have a pizza stone, then place the baking tray upside down and pre-heat it. Keeping the tray upside down helps to slide the bread quickly.
- Remove the cling film and carefully place the rolled bread on the pizza stone.
- Bake at 450 deg F for four minutes and flip it once and bake again for one minute.
- Now carefully remove them from the oven and allow it to cool a bit.
- You can serve this with hummus or cut them into halves and fill it with salad. I will post what I did with my pita pockets.
Notes
- As we are handling hot oven here, please be careful while placing the bread and removing it from the oven.
- You can add the salt to the water container as well instead of mixing it with the flour. This measure works perfectly fine, but with different flours, it might not be the case.
- Adjust the yeast amount or the resting time accordingly.
- Flipping and baking are not necessary; you can bake it for 4 minutes or until the bread puffs up. It should not take more than 6 to 7 minutes.
Nutrition
I am not a nutritionist. The nutritional information is provided as a courtesy and is an estimate only. It varies depending upon the product types or brands.
P.S. Follow my Pinterest boards for more healthy and delicious recipes.

Hi, would pan-frying give similar results?
I haven’t tested it out. But it should be ok. Because I fan fry yeast based naan and its ok.
Rotimatic makes the whole process a breeze!
Very true.