
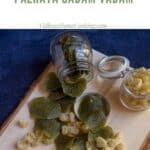
Have you imagined a snack with leftover rice? Then make this easy and simple vadam/sun-dried fryums and stock them up. Check out how to make two kinds of vadams or vadagams with leftover rice with a detailed video.
Here is one such vadam recipe with leftover rice. While you can prepare delicious yogurt rice and neeragaram/leftover rice porridge, I recommend making this vadam also.
It’s a great way to use leftover rice. All you need to do is blend the rice, flavor it up with your preferred condiments, and dry in the sun. That’s it. It is as simple as that. You can prepare them in bulk during summer and store them.
These leftover rice fryums are-
Super easy to make
No special equipment needed
Best way to use the leftover rice
And they are vegan and gluten-free.
How to store the fryums-
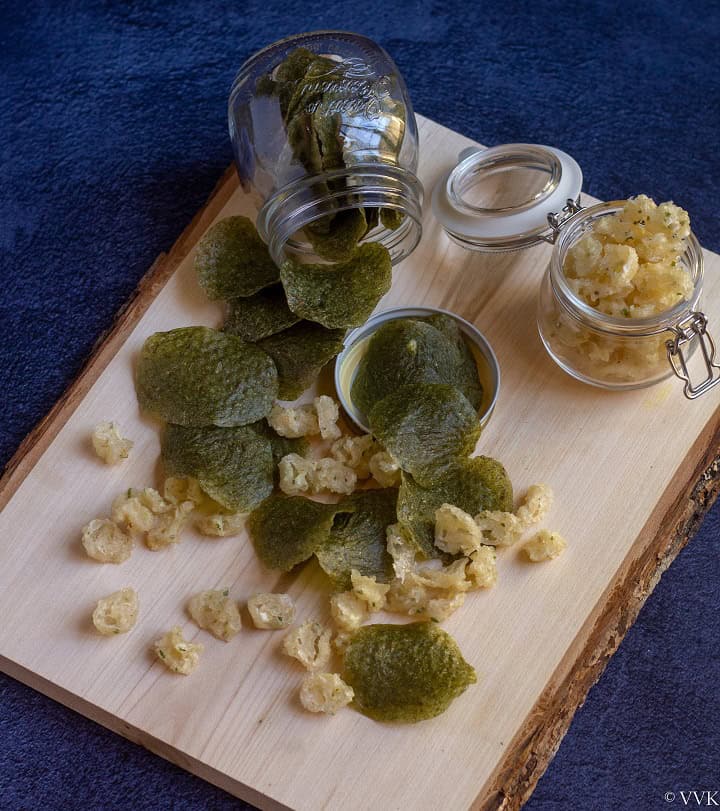
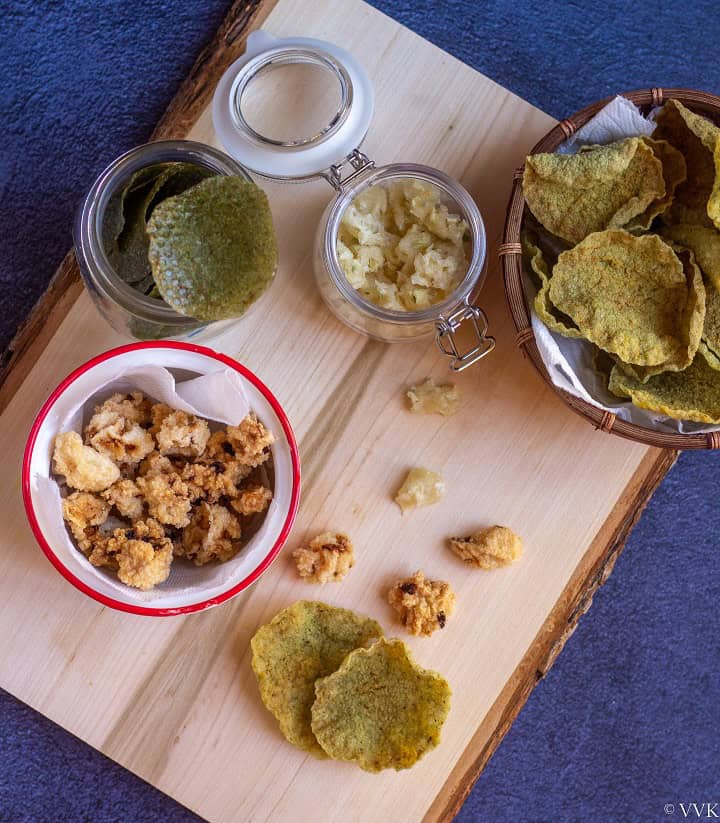
This time, I made only a small quantity. I got about 80 onion vadam and about 40 green vadam. You can make the vadams in bulk, and after drying, you can store them in an air-tight container, and it stays good for a year. We usually make vadams every summer and stock up for that entire year.
How to serve the fryums-
Deep fry as required, and you serve this with any rice dishes, or you can just munch on them like a snack. I like it with kalanda sadam or variety- rice dishes and also with rasam rice.
Let me first explain the two kinds of leftover rice fryums or the vadams that I am going to share today. In Tamil, we call them as pazhaya sadam vadam or vadagam.
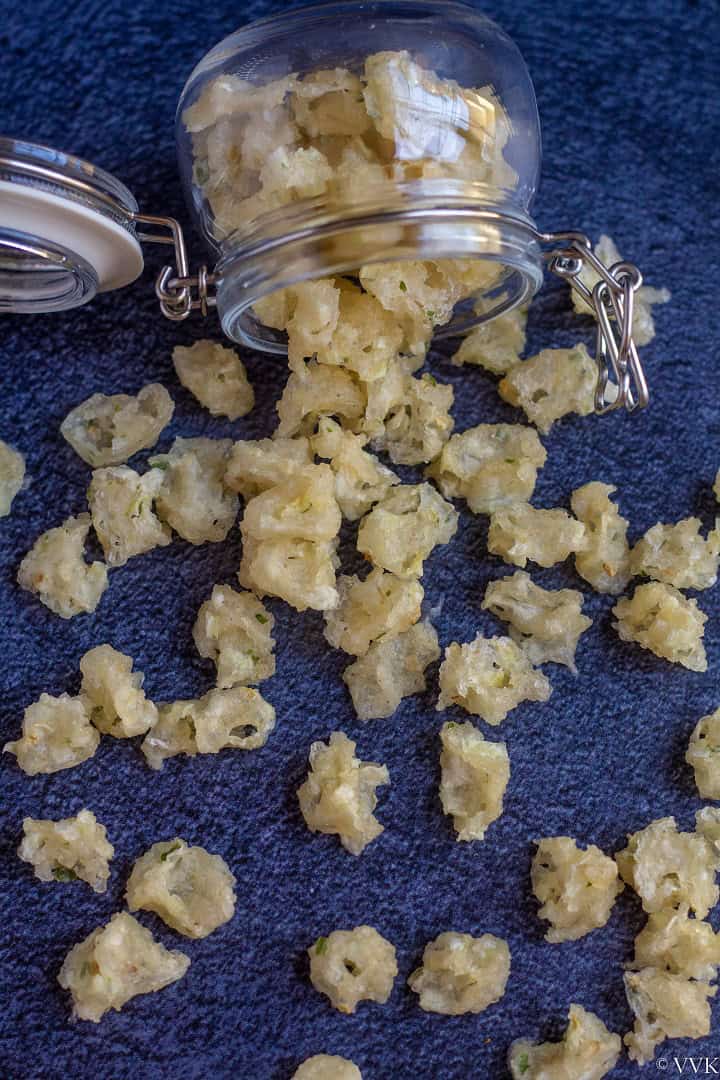
Killu vadam or onion vadam-
The first one is killu vadam. Killu means “pinch/to pinch” in Tamil. We grind the cooked rice, make it into a thick dough, pinch small portions of the dough, and dry them. Hence the name killu vadam. Some call as onion vadam, as we add onions in the dough.
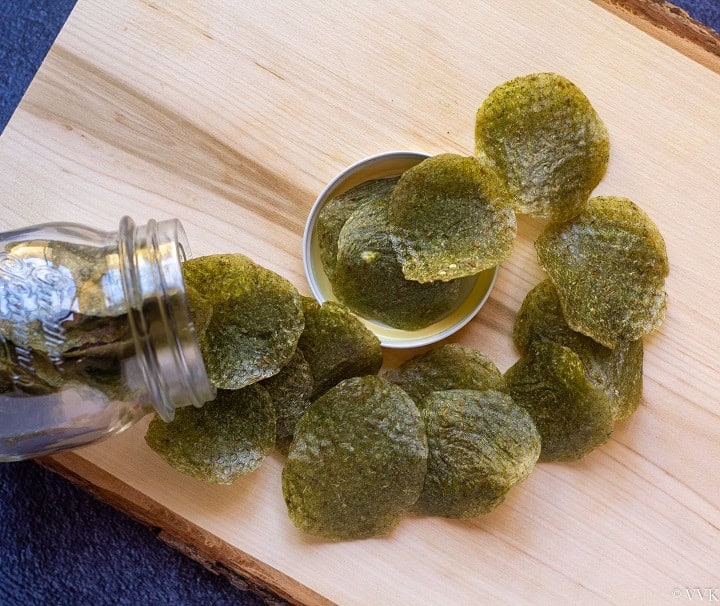
Kinnam vadam or green vadam-
Honestly, folks, I didn’t know how to call or name this vadam. The batter is more like sago or javvarisi vadam in the pouring consistency. Maybe you can call this as kinnam (kinnam Tamil word for a small bowl) vadam or bowl vadam. I am calling it as green vadam as the vadam is green in color. Thanks to the three popular Indian herbs – curry leaves, cilantro, and mint leaves. You can call this as herbal vadam also. :-) I am leaving the naming part up to you.
Leftover Rice Fryums Preparation-
Now let’s see the preparation in detail. I used 2 cups of cooked rice for each vadam, and I did not soak the cooked rice; we usually don’t add any salt while cooking the rice. So its unsalted cooked rice. And I used the sona masoori rice variety. I haven’t tried this vadam with any other rice varieties.
Preparing the batter/dough for killu vadam-
- In a mixer jar, add two cups of cooked rice and two green chilies broken into small pieces. Add water little by little and grind into a thick dough-like consistency, as shown in the video. PS – I am using the term dough here as its thick. You can call it however you prefer.
- Depending upon the mixer jar size, work in batches and prepare the dough. For this entire two cups of rice, I used only ¼ cup of water. If your rice is mushy or if you had soaked the rice, you won’t need a ¼ cup of water even. Add water cautiously.
- Transfer the ground rice mix into a bowl and add salt and the chopped onion. Mix thoroughly. Make sure the salt is well incorporated and set it aside. The killu vadam dough is ready.
Preparing the batter for green vadam-
- In a mixer jar, add 2 cups of cooked rice, cumin seeds, carom seeds, salt, green chilies, mint leaves, curry leaves, and cilantro.
- As we need a pouring consistency batter for this vadam, add little extra water. Add about 1 cup of water and grind it into a smooth batter as shown in the video.
- Rinse the mixer jar with ¼ cup of water and add it to the batter. Check the consistency. It should not be too thick, and it should not be too runny. I added ¼ more cup of water. I used 1.5 cups of water in total. Again, if your rice is mushy or if you had soaked the rice, you won’t need 1.5 cups of water.
Watch me make the vadam-
I made a detailed video of the vadam making process. Please find it below. If you haven’t subscribed to my channel, please do subscribe.
Sun-Drying Process-
- I place the vadams on a transparent shelf-liner. I place it on a table, but you can keep it on the ground also. Also, I place two wooden planks on the side, so they stay in place.
Killu Vadam-
- Wet your palms, take a handful of batter, pinch a small portion of the batter, and place them on the liner. Make sure there is some space in between each vadam. Similarly, do the same with the remaining dough.
Green Vadam-
- In the same liner or a separate one, drop a spoonful of green vadam batter. I used my 1 tbsp measure spoon. Make sure there is some space in between each vadam. Similarly, do the same with the remaining batter.
Schedule that I followed-
Now keep the vadams in a sunny area and dry under the direct sun for three days or until they are dry. There shouldn’t be any moisture left. Depending upon the area you live in, the timing might differ.
Here is the schedule that I followed,
- First Day | Day 1 – Prepared the batter and placed the vadam for drying
- Second Day | Day 2 morning – Flipped the killu vadam and let it dry
- Third-Day | Day 3 morning – Flipped the green vadam and let it dry
- Day 3 afternoon- Transferred the vadam to a plate and covered it with a cotton cloth, and kept it under the sun. Covering with a cotton cloth helps in windy weather and helps to keep the vadam in place.
- Day 3 evening – The vadams were completely dry, and I transferred it to an air-tight container.
Frying the vadams-
- Heat the oil as required for deep frying the vadams. When the oil is hot, add the fryums. For the green vadam, you don’t need to flip and make sure you press it when it is in the oil so that it doesn’t curl. Don’t fry them for more than 20 seconds. They turn brown very fast.
- And same with the onion vadam. Drop the vadams in the hot oil, and fry till it’s light golden brown or until the bubbling sound stops.
Recipe Notes-
- You can make this leftover rice fryums with par-boiled or raw rice variety. Par-boiled rice has its flavor. I have tried this vadam only with raw rice variety.
- While most of the recipes ask to soak the rice, I have always made this vadam without soaking the rice. It has always worked out. I haven’t had any issues.
- Adjust the salt and spices according to your preference.
- You can make the green vadam either with mint or cilantro or curry leaves. I love the combination of all three. Also, cumin seeds and carom seeds are optional. Adjust the measure accordingly.
- If you had soaked the rice or if your rice is mushy, adjust the water amount. Please check the batter/dough consistency in the video.
- If your batter has become runny, you can add some rice flour and thicken it up.
- Do not leave the vadam outside in the night.
Other Fryum Recipes-
PS: Follow me on Instagram or join my Facebook Group for more gardening and recipe updates. If you try these leftover rice fryums, please don’t forget to comment and rate this recipe. If you have any questions, please leave a comment, and I will get to it asap. Make sure to follow me on my Pinterest for more healthy and delicious ideas!
📖 Recipe
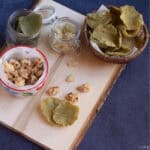
Leftover Rice Fryums | Pazhaya Sadam Vadam | Rice Vadagam
Equipment
- mixer jar or blender
Ingredients
Measurement Details: 1 cup=240ml; 1 tbsp=15ml; 1tsp=5ml;
For killu vadam
- 2 cups leftover rice
- 2 green chilies
- ½ cup chopped onion
- 1 tsp salt or to taste
- ¼ cup water
For green vadam
- 2 cups leftover rice
- ½ tsp cumin seeds
- ½ tsp carom seeds
- 2 green chilies
- 10 mint leaves
- 10 curry leaves
- 2 tbsp cilantro chopped
- 1 tsp salt
- 1.5 cups water
For Frying
- 1 cup oil for frying
Instructions
- Preparing the batter/dough for killu vadam:In a mixer jar, add two cups of cooked rice and two green chilies broken into small pieces. Add water little by little and grind into a thick dough-like consistency, as shown in the video. PS - I am using the term dough here as its thick. You can call it however you prefer.
- Depending upon the mixer jar size, work in batches and prepare the dough. For this entire two cups of rice, I used only ¼ cup of water. If your rice is mushy or if you had soaked the rice, you won't need a ¼ cup of water even. Add water cautiously.
- Transfer the ground rice mix into a bowl and add salt and the chopped onion. Mix thoroughly. Make sure the salt is well incorporated and set it aside. The killu vadam dough is ready.
- Preparing the batter for green vadam:In a mixer jar, add 2 cups of cooked rice, cumin seeds, carom seeds, salt, green chilies, mint leaves, curry leaves, and cilantro.
- As we need a pouring consistency batter for this vadam, add little extra water. Add about 1 cup of water and grind it into a smooth batter as shown in the video.
- Rinse the mixer jar with ¼ cup of water and add it to the batter. Check the consistency. It should not be too thick, and it should not be too runny. I added ¼ more cup of water. I used 1.5 cups of water in total. Again, if your rice is mushy or if you had soaked the rice, you won't need 1.5 cups of water.
- Sun-Drying Process:I place the vadams on a transparent shelf-liner. I place it on a table, but you can keep it on the ground also. Also, I place two wooden planks on the side, so they stay in place.
- Killu Vadam:Wet your palms, take a handful of batter, pinch a small portion of the batter, and place them on the liner. Make sure there is some space in between each vadam. Similarly, do the same with the remaining dough.
- Green Vadam:In the same liner or a separate one, drop a spoonful of green vadam batter. I used my 1 tbsp measure spoon. Make sure there is some space in between each vadam. Similarly, do the same with the remaining batter.
- Now keep the vadams in a sunny area and dry under the direct sun for three days or until they are dry. There shouldn't be any moisture left. Depending upon the area you live in, the timing might differ.
- Here is the schedule that I followed,Day 1 - Prepared the batter and placed the vadam for drying
- Day 2 morning - Flipped the killu vadam and let it dry
- Day 2 evening around 3 PM - Flipped the green vadam and let it dry
- Day 3 - Transferred the vadam to a plate and covered it with a cotton cloth, and kept it under the sun. Covering with a cotton cloth helps in windy weather and helps to keep the vadam in place.
- Day 3 evening - The vadams were completely dry, and I transferred it to an air-tight container.
- Frying the vadams:Heat the oil as required for deep frying the vadams. When the oil is hot, add the fryums. For the green vadam, you don't need to flip and make sure you press it when it is in the oil so that it doesn't curl. Don't fry them for more than 20 seconds. They turn brown very fast.
- And same with the onion vadam. Drop the vadams in the hot oil, and fry till it's light golden brown or until the bubbling sound stops.
Video
Notes
- You can make this vadam with par-boiled or raw rice variety. Par-boiled rice has its flavor. I have tried this vadam only with raw rice variety.
- While most of the recipes ask to soak the rice, I have always made this vadam without soaking the rice. It has always worked out. I haven't had any issues.
- Adjust the salt and spices according to your preference.
- You can make the green vadam either with mint or cilantro or curry leaves. I love the combination of all three. Also, cumin seeds and carom seeds are optional. Adjust the measure accordingly.
- If you had soaked the rice or if your rice is mushy, adjust the water amount. Please check the batter/dough consistency in the video.
- If your batter has become runny, you can add some rice flour and thicken it up.
- Do not leave the vadam outside in the night.
Nutrition
I am not a nutritionist. The nutritional information is provided as a courtesy and is an estimate only. It varies depending upon the product types or brands.
Update Notes: This recipe was originally posted in 2015 but now updated with new pics, video, and also the green vadam recipe.

I don’t have direct sunlight, can I still make them?
You can bake them in the oven at the lowest temperature. I am testing those and I will update them soon.
Thank you. I made the killu vadam/ pagoda vadam with flavors we like based on your recipe. For readers in cold places and those who don’t have the patience for sun drying, I dried in my oven at 150°F for 4 hours, flipped and dried again for 2 hours and left it in my oven to cool. Test batch on frying yielded absolutely delicious crispy crunchy vadams . I plan to try variations with ground tomatoes, garlic etc.
Thank you so much for the feedback and for the oven timings. I am sure it would help others.
Congrats Vidhya :) Luv this onion vadagam.
Thanks. :-)
Looks innovative and delicious Sri…
Thanks a lot chitra.
Congrats Vidhya, you truly deserve! Now lets celebrate together, pack some of your ammas fryums!
Congrats Vidhya ….:)
……DH loves these vadagams:)
Congratulations dear. and this looks so crispy and yummy!
What a creative way to use left over rice, we usually just make some fried rice. Also many congrats!
Hearty congratulations dear!!….Vadagams looks simply superb!!
Great recipe I am going to have to try this after work today!
Thanks Sarah, do let me know how it turned out. And Welcome to my space.
Very happy to see ur name in that list Sri:-) keep rocking..can someone say no for vadam that too leftover rice, clear winner
Thankoooo vids
Congrats Vidhya, you totally deserve it ?
Thanks a lot FV
That is a good idea.. I usually end up throwing the left over .. will try this
Sure. Thanks
Congratulations, Vidhya! It is truly well-deserved.
And another gem of a recipe from you. I absolutely love vadagams. :-)
Awww.. Thanks a lot Aruna for your encouraging words.
Big congrats on this major achievement Sri :) I love these fryums – should ask amma to make some :D
Thanks a lot GB. :-) :-)