

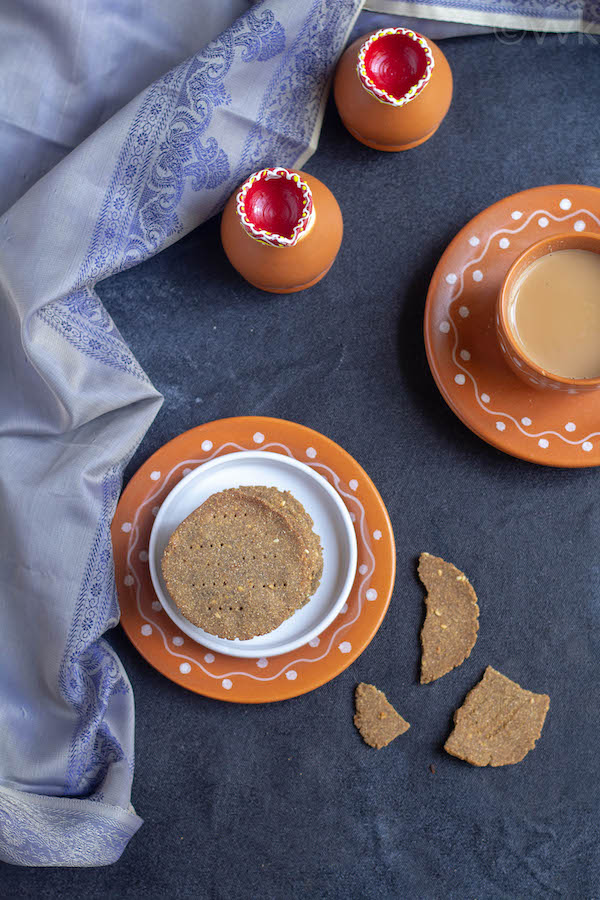
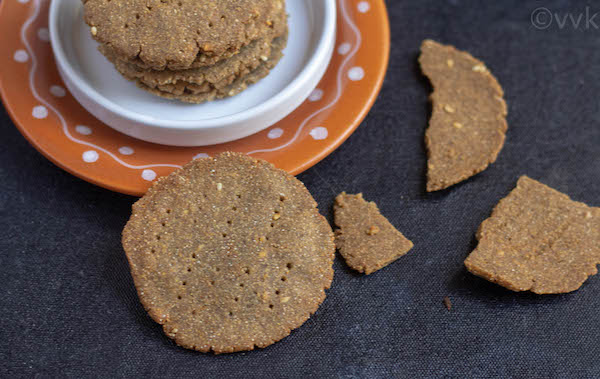
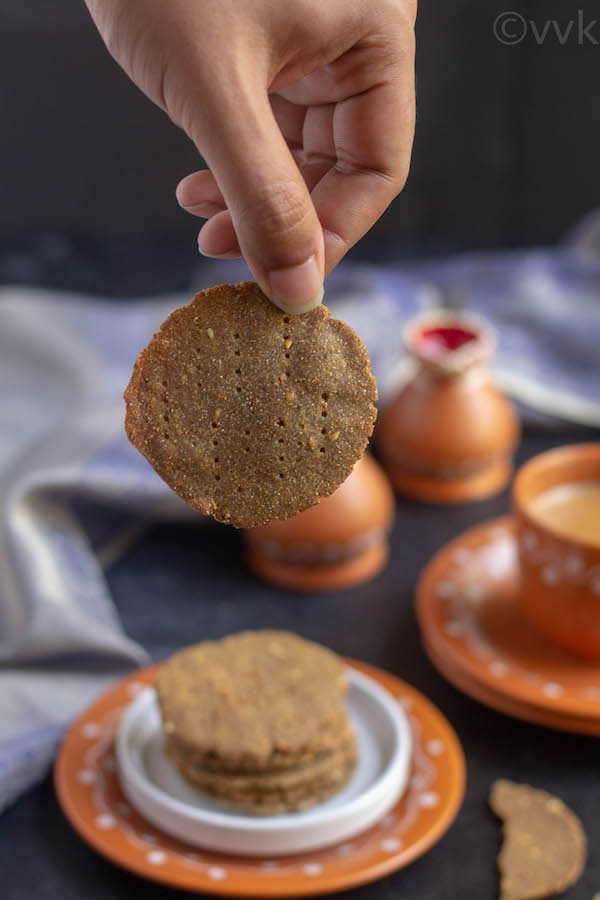
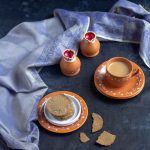
Kambu | Bajra Thattai – A delicious savory cracker made with the humble pearl millet with the flavor of carom seeds. Check out this delightful Diwali special savory recipe with the detailed video below.
 I am back with another savory recipe but this time with the millet, precisely pearl millet. I am so glad that millets are gaining their popularity back again. Of all the millets, pearl millet is my favorite, maybe because I grew up drinking the gruel or the kambu koozh. :-) So I thought of making a sweet and a savory recipe with pearl millet this time.
For this thattai, I went with simple flavors. I did not include any channa dal or red chili powder. I went with only carom seeds for the flavor. The combination is perfect, and it is a great tea/coffee accompaniment for sure.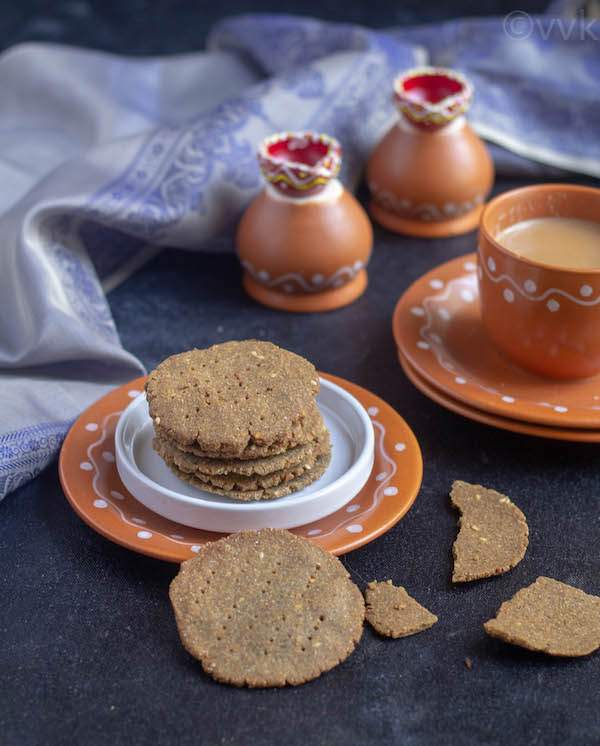 Please check the notes section for the handy tips while frying. When I am shooting these fried goodies, I am so focused on the hot oil and the frying process that I forget some key points. I know I need to improve a lot but one step at a time. :-)
Here is my kambu thattai recipe and I will be sharing the kambu laddu recipe tomorrow. Here is the video for both the recipes and I have included the recipe details in the video description box as well. Please do subscribe to my channel and stay tuned for the new video every week. Also, help me spread the word by liking and sharing the video.
How to Make Kambu Thattai or Pearl Millet Savory Crackers?
Ingredients:
- Pearl Millet Flour – ½ cup
- Urad Dal Flour – ½ tbsp
- Roasted Gram Flour – ½ tbsp
- Rice Flour – ½ tbsp
- Coconut Oil – 1 tbsp + 3 to 4 tbsps
- Oil – for frying
- Salt – ¾ tsp
- White Sesame Seeds – ½ tsp
- Cumin Seeds – ½ tsp
- Carom Seeds – ¼ tsp
- Hing – ¼ tsp
- Water – ¼ cup
Other things required:
Two Ziploc bags and a small vessel with a flat surface like davara.
Prep-Work:
- Dry roast about 2 tbsp of urad dal flour without adding any oil and grind it into a smooth powder. Set aside ½ tbsp
- Grind roasted gram dal into a fine powder and set aside ½ tbsp.
- Make the homemade pearl millet flour as mentioned in this post, or you can use store-bought one as well. You can dry the store-bought for a couple of minutes, but that is optional.
Steps:
- In a mixing bowl, add the pearl millet flour, rice flour, urad dal flour, roasted gram flour, salt, hing, white sesame seeds, cumin seeds, and carom seeds.
- First, add 1 tbsp of coconut oil and mix it thoroughly.
- Then add water little by little and make a soft and smooth dough. The dough should not be too watery and too stiff and dry too. Also, the dough, should not stick to the bowl.
- Now spread a little coconut oil on both the Ziploc bags and in your palm.
- Then pinch a small gooseberry sized ball and shape it into a nice round without any crack. Press it slightly.
- Place this on one Ziploc and cover it with the other Ziploc with the oil-coated side and using the davara press it as shown in the video.
- Then adjust the edges and using a fork prick the thattai so that it doesn’t puff up. Place the thattai in another Ziploc coated with oil or a plate greased with oil.
- Meanwhile, heat the oil for frying and when the oil is hot, fry the thattai until the bubbling sound ceases. Usually, millet flour thattai takes a long time when compared to the rice flour thattai.
- Drain it in a tissue paper. Press and fry the thattai similarly with the remaining dough. Check the notes for pressing and frying.
- Allow the thattai to cool before storing it in an airtight container.
Notes:
Pressing and Frying:
- Don’t press all the thattai at once. Press two to three and fry them. As millet flour thattai takes a longer time to cook, you can press the thattai during the frying process.
- Also, cover the pressed thattai with tissue or cloth.
- Using a butter knife or flat spoon, take the thattai from the plate. If it breaks while lifting it from the plate, you can press it again. I would recommend keeping the thatti in another Ziploc bag. For video purposes, I went with a plate (so that I can show the pricked thattai nicely), but you can keep the pressed thattai in the Ziploc bag greased with oil as it is easy to remove and fry.
Misc:
- You can use any millet flour instead of pearl millet flour.
- I did not include any red chili powder, but you can add up to ⅓ to ½ tsp.
- Adjust the salt and carom seeds according to your preference.
- Depending upon the quality of the flour, the water amount will differ. So adjust accordingly.
📖 Recipe
Kambu | Bajra Thattai
A delicious savory cracker made with the humble pearl millet with the flavor of carom seeds.Servings: 4Calories: 316kcalIngredients
- ½ cup Pearl Millet Flour
- ½ tbsp Urad Dal Flour
- ½ tbsp Roasted Gram Flour
- ½ tbsp Rice Flour
- 5 tbsp Coconut Oil
- 2 cups Oil for frying
- ¾ tsp Salt
- ½ tsp White Sesame Seeds
- ½ tsp Cumin Seeds
- ¼ tsp Carom Seeds
- ¼ tsp Hing
- ¼ cup Water
Other things required:
- Two Ziploc bags and a small vessel with a flat surface like davara.
Instructions
- Prep-Work:Dry roast about 2 tbsp of urad dal flour without adding any oil and grind it into a smooth powder. Set aside ½ tbsp
- Grind roasted gram dal into a fine powder and set aside ½ tbsp.
- Make the homemade pearl millet flour as mentioned in this post, or you can use store-bought one as well. You can dry the store-bought for a couple of minutes, but that is optional.
- Steps:In a mixing bowl, add the pearl millet flour, rice flour, urad dal flour, roasted gram flour, salt, hing, white sesame seeds, cumin seeds, and carom seeds.
- First, add 1 tbsp of coconut oil and mix it thoroughly.
- Then add water little by little and make a soft and smooth dough. The dough should not be too watery and too stiff and dry too. Also, the dough, should not stick to the bowl.
- Now spread a little coconut oil on both the Ziploc bags and in your palm.
- Then pinch a small gooseberry sized ball and shape it into a nice round without any crack. Press it slightly.
- Place this on one Ziploc and cover it with the other Ziploc with the oil coated side and using the davara press it as shown in the video.
- Then adjust the edges and using a fork prick the thattai so that it doesn't puff up. Place the thattai in another Ziploc coated with oil or a plate greased with oil.
- Meanwhile, heat the oil for frying and when the oil is hot, fry the thattai until the bubble sound ceases. Usually, millet flour thattai takes a long time when compared to the rice flour thattai.
- Drain it in a tissue paper. Press and fry the thattai similarly with the remaining dough. Check the notes for pressing and frying.
- Allow the thattai to cool before storing it in an airtight container.
Video
Notes
Pressing and Frying:- Don't press all the thattai at once. Press two to three and fry them. As millet flour thattai takes a longer time to cook, you can press the thattai during the frying process.
- Also, cover the pressed thattai with tissue or cloth. Using a butter knife or flat spoon, take the thattai from the plate. If it breaks while lifting it from the plate, you can press it again.
- I would recommend keeping the thatti in another Ziploc bag. For video purpose, I went with a plate (so that I can show the pricked thattai nicely), but you can keep the pressed thattai in the Ziploc bag greased with oil as it is easy to remove and fry.
- You can use any millet flour instead of pearl millet flour.
- I did not include any red chili powder, but you can add up to ⅓ to ½ tsp.
- Adjust the salt and carom seeds according to your preference.
- Depending upon the quality of the flour, the water amount will differ. So adjust accordingly.
Nutrition
Calories: 316kcal | Carbohydrates: 1g | Protein: 1g | Fat: 28g | Saturated Fat: 15g | Cholesterol: 0mg | Sodium: 437mg | Fiber: 0g | Sugar: 0g | Calcium: 4mg | Iron: 0.2mgI am not a nutritionist. The nutritional information is provided as a courtesy and is an estimate only. It varies depending upon the product types or brands.
Tried this recipe?Mention @vidhyasvegetariankitchen or tag #vidhyasvegkitchenFor Video RecipesCheck out My YouTube Channel

Leave a Reply